Nextcloud/Installation/AIO
Nextcloud/Installation/AIO - Nextcloud All In One Installation
Beschreibung
- Docker
Voraussetzung ist eine funktionierende Docker-Installation.
Installation
Nextcloud in Docker laden und starten
sudo docker run \
--sig-proxy=false \
--name nextcloud-aio-mastercontainer \
--restart always \
--publish 80:80 \
--publish 8080:8080 \
--publish 8443:8443 \
--volume nextcloud_aio_mastercontainer:/mnt/docker-aio-config
--volume /var/run/docker.sock:/var/run/docker.sock:ro \
ghcr.io/nextcloud-releases/all-in-one:latest
- sudo docker run — Startet einen neuen Container aus einem Image
- --sig-proxy=false — Deaktiviert die Weiterleitung von Signalen (z. B. SIGINT/SIGTERM) vom Docker-Client an PID 1 im Container.
- --name nextcloud-aio-mastercontainer — Vergibt einen eindeutigen Containernamen zur späteren Referenz.
- --restart always — Aktiviert die Neustart-Richtlinie „always“: Container wird nach Absturz oder Daemon-Neustart automatisch neu gestartet außer nach manuellem docker stop.
- --publish 80:80 — Veröffentlicht Container-Port 80 TCP auf Host-Port 80 TCP
- --publish 8080:8080 — siehe oben
- --publish 8443:8443 — siehe oben
- --volume nextcloud_aio_mastercontainer:/mnt/docker-aio-config — Bindet ein benanntes Volume ein. Persistiert Konfiguration unter /mnt/docker-aio-config im Container. Volume wird automatisch erstellt, falls nicht vorhanden.
- --volume /var/run/docker.sock:/var/run/docker.sock:ro — Bindet den Docker-Daemon-Socket des Hosts im Container ein (read-only). Erlaubt dem AIO-Mastercontainer, über die Docker-API Host-Container zu erstellen/stoppen/konfigurieren. :ro verhindert das Modifizieren/Ersetzen der Socket-Datei, begrenzt jedoch nicht die API-Berechtigungen.
- ghcr.io/nextcloud-releases/all-in-one:latest — Image-Referenz inkl. Tag. latest verwendet den jeweils neuesten Build
AIO interface
Next, you can open the AIO interface on https://localhost:8080 or https://the.servers.ip.address:8080.
- Why you should use an ip-address
- It’s important to always use an ip-address if you access this port, and not a domain. Otherwise, you risk that HSTS might block access to it later!
3. You need to accept the self-signed certificate. Then you should see this:
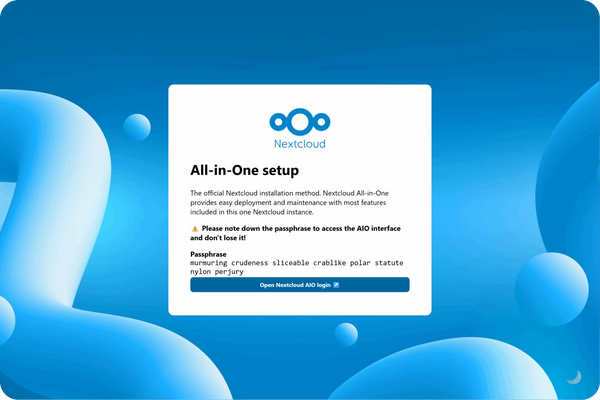
- Alternatively, if ports 80 and 8443 should be opened in your firewall/router and a domain is configured to point to your server, you can reach the AIO interface with a valid certificate using https://your-domain.com:8443.
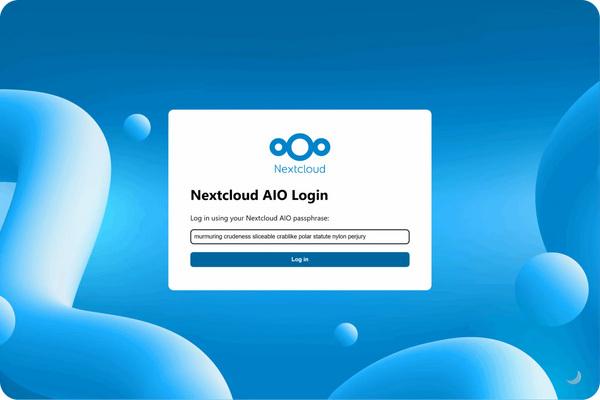
4. Click on “Open Nextcloud AIO login” and paste your password:
5. Then, you should see the AIO interface:
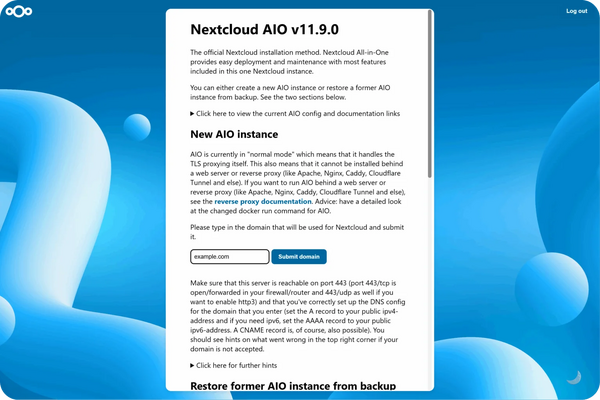
6. Next, type in your public domain that you you’ve got before doing this guide. The interface should help you figure out the exact steps. (Set up DDNS for your domain to point to your public IP, port-forward at least ports 443/tcp, 3478/udp, and 3478/tcp to your Linux machine.)
7. After you’ve set it up correctly, it should allow you to pass to the next step, where you can configure the wanted optional add-ons and the timezone, and click on “Start containers” to download and start them.
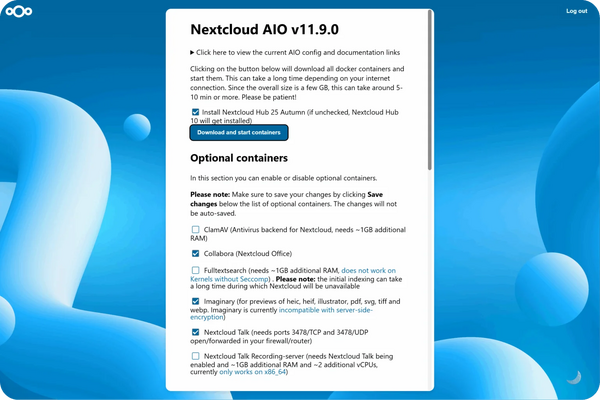
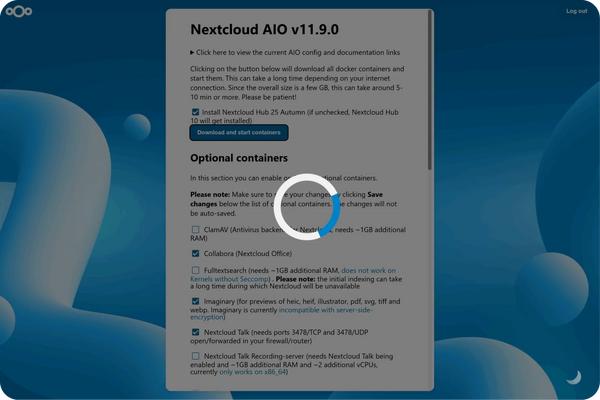
8. At this point, you should see a spinner that will take a while depending on your internet speed. It should take around 10 minutes or more.
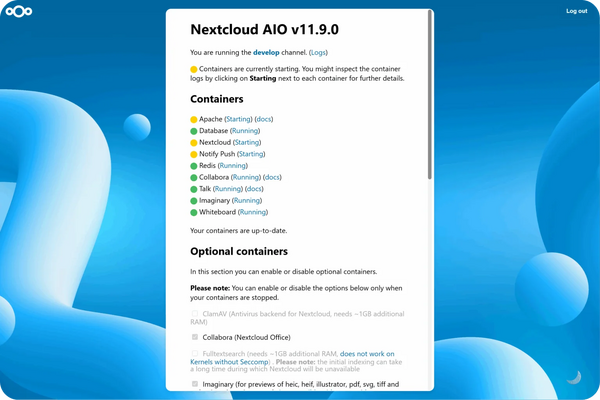
9. When all containers are downloaded and started, you will see this screen showing the containers still starting, which will do the first installation for you:
10. When everything is done, you should see this screen:
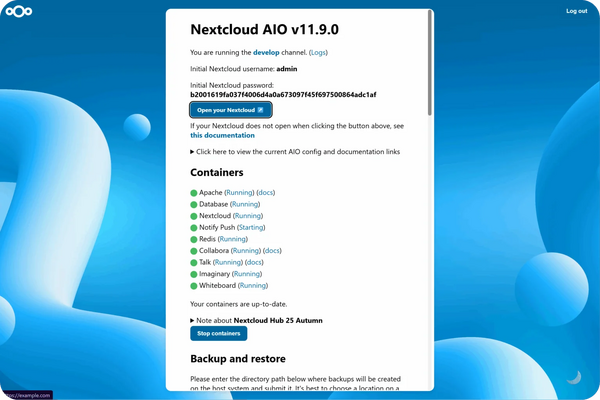
11. Finally, you can now open your new Nextcloud instance and log in with the given admin credentials.
12. That’s it! Everything is set and ready for production.
Management
Die Verwaltung von Nextcloud erfolgt über:
- AIO-Webpanel
- Verwaltung von Containern über das Webpanel oder die Docker-CLI
- Nextcloud OCC
AIO-Weboberfläche
Der Master-Container stellt eine Web-Administrationsoberfläche auf Port 8080 bereit.
https://<host_IP>:8080
Über die Oberfläche stehen Konfiguration, Start/Stop der Dienste, Updates und Backups zur Verfügung.
Für den Zugriff ist eine Anmeldung erforderlich. Danach ist der Zugriff entweder direkt über Port 8080 oder über Settings > Overview > Open Nextcloud AIO Interface möglich.
Datenzugriff
Volumes anzeigen:
docker volume ls | grep nextcloud_aio
Container
list
Alle AIO-Container anzeigen:
docker ps -a --filter "name=nextcloud-aio"
start
Nur den Master-Container starten (weitere Container werden über die Oberfläche gestartet):
docker start nextcloud-aio-mastercontainer
stop
Falls ein Stopp über die Oberfläche nicht möglich ist, können die Container per CLI gestoppt werden.
docker ps --filter "name=nextcloud-aio"
docker stop <id>
logs
Zustand prüfen:
docker logs -f nextcloud-aio-nextcloud
OCC
Zur Verwaltung von Nextcloud kann auch occ verwendet werden:
docker exec -u www-data -it nextcloud-aio-nextcloud php occ <Befehl>
Siehe Hauptartikel occ
Anhang
Siehe auch
Dokumentation
Links
Projekt
Weblinks